
Introduction
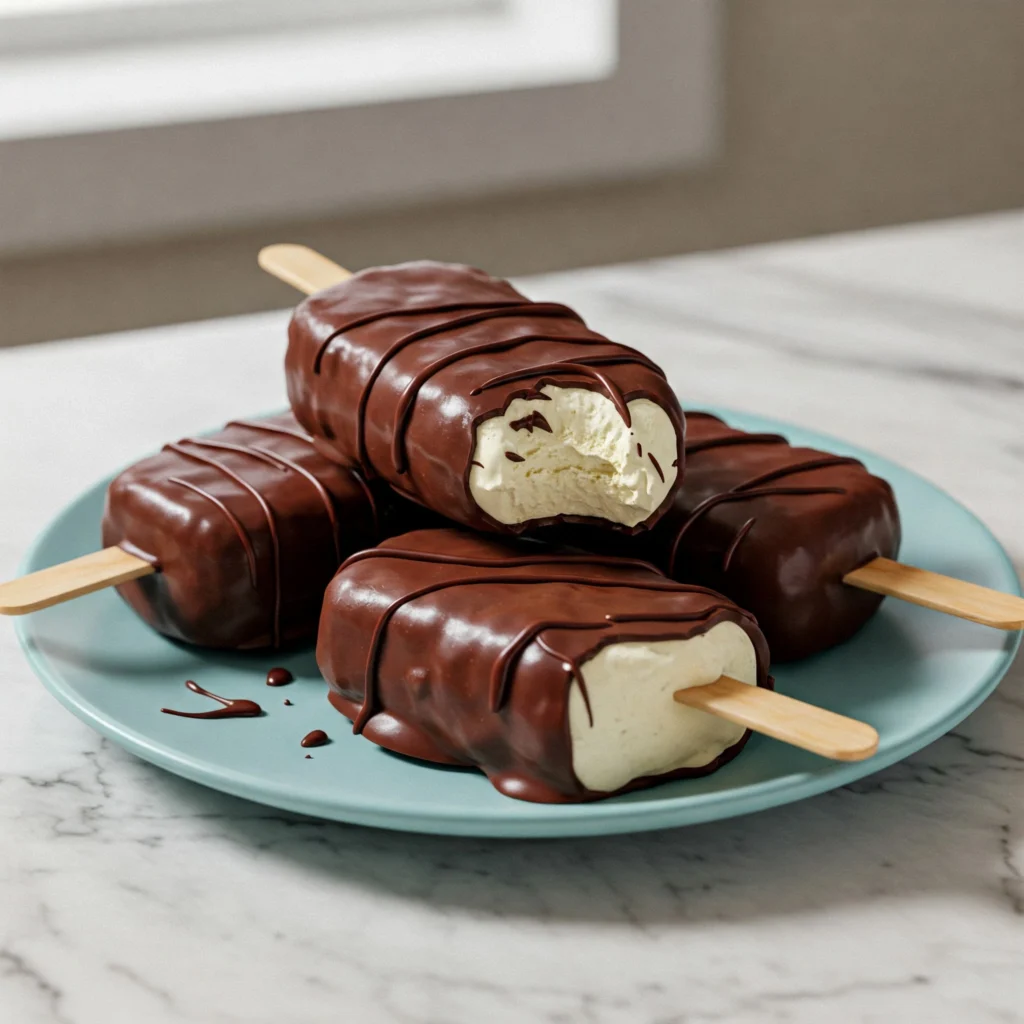
Table of Contents
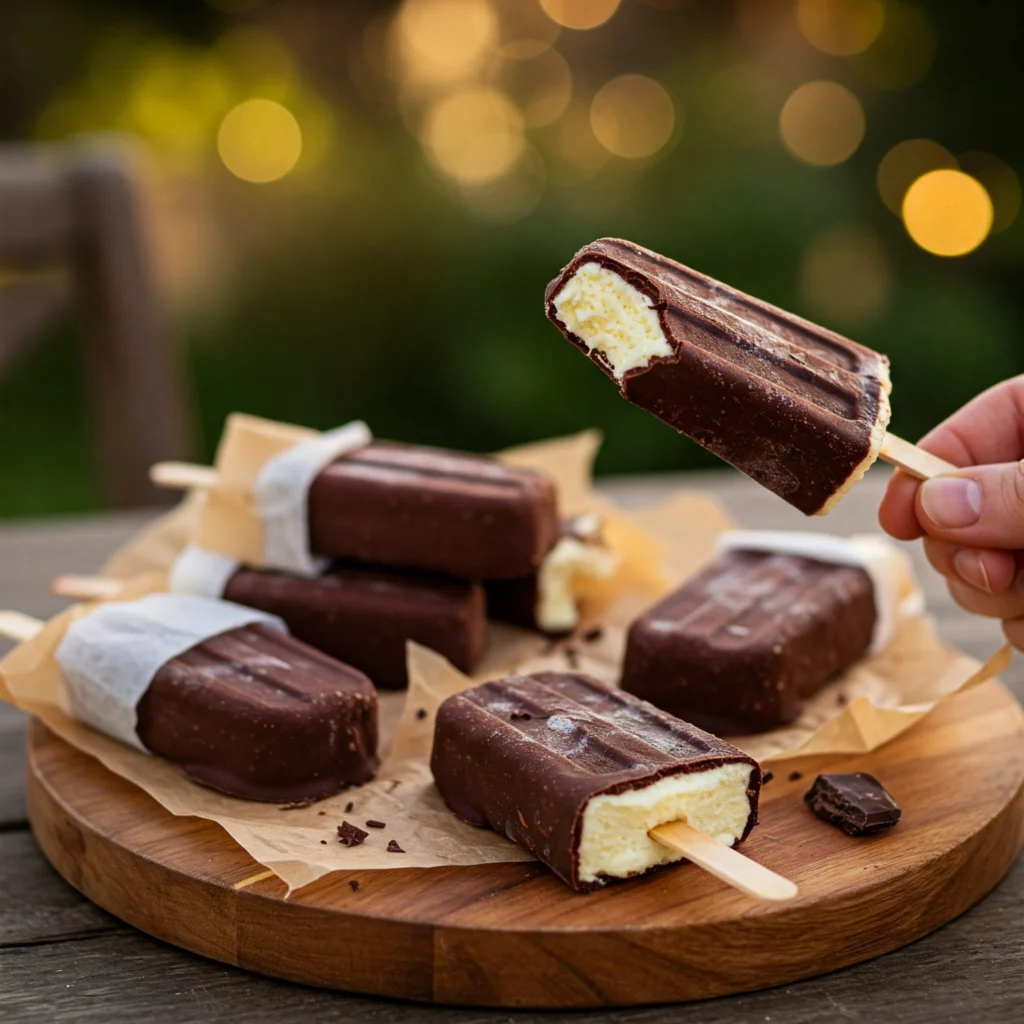
Remember those ice cream truck bells that made you rush outside as a kid? The Eskimo Pie was always a favorite treat! These chocolate-covered vanilla ice cream bars have been making people smile since 1921. Our homemade Eskimo pie popsicle recipe brings this classic joy right to your kitchen. Making these treats at home means fresher taste, better ingredients, and the fun of creating something special with your own hands.
Store-bought versions can’t match the creamy texture and rich flavor of homemade Eskimo pies. When you make your own homemade Eskimo pie popsicle recipe, you control exactly what goes in – no weird preservatives or artificial flavors. Plus, they taste way better!
In this guide, you’ll learn everything about making perfect Eskimo pies at home. We’ll walk through a simple 5-step process, share tips for the creamiest ice cream, and show you how to get that perfect chocolate crack when you bite in. Get ready to become the most popular person on your block this summer!
What You’ll Need for Your Homemade Eskimo Pie Popsicle Recipe
Before diving into our homemade Eskimo pie popsicle recipe, gather these simple ingredients:

- 2 cups heavy cream
- 1 cup whole milk
- ¾ cup sugar
- 2 teaspoons vanilla extract
- Pinch of salt
- 8 ounces good-quality chocolate (milk or dark)
- 2 tablespoons coconut oil
Don’t have heavy cream? Half-and-half works too. Vegan? Swap dairy for coconut cream and plant milk. The sugar can be reduced if you prefer less sweetness.
For equipment, you’ll need:
- Popsicle molds (or paper cups and wooden sticks)
- Mixing bowls
- Whisk
- Saucepan
- Heatproof measuring cup or bowl
- Baking sheet lined with parchment paper
This homemade Eskimo pie popsicle recipe takes about 20 minutes to prepare, 4-6 hours to freeze the base, and another hour for the chocolate coating and final setting. Most of this is hands-off time, so you can easily fit it into your day!
Why This Homemade Eskimo Pie Popsicle Recipe Works
The secret to our homemade Eskimo pie popsicle recipe is in the science. When you mix fat (from cream) with sugar, it creates a super smooth texture that doesn’t get icy when frozen. The higher fat content means fewer ice crystals and a creamier bite.
The magic chocolate shell happens because of coconut oil! When mixed with melted chocolate, coconut oil helps the coating flow smoothly over cold ice cream. Then, when it hits the freezing surface, it hardens almost instantly, creating that satisfying crack when you bite in.
Making Eskimo pies at home gives you benefits you just can’t get from the store:
- Fresher taste with no preservatives
- Control over ingredients and sweetness
- The fun of a food project (kids love helping!)
- More budget-friendly than premium ice cream bars
- Customize them exactly how you like
The 5-Step Homemade Eskimo Pie Popsicle Recipe Process
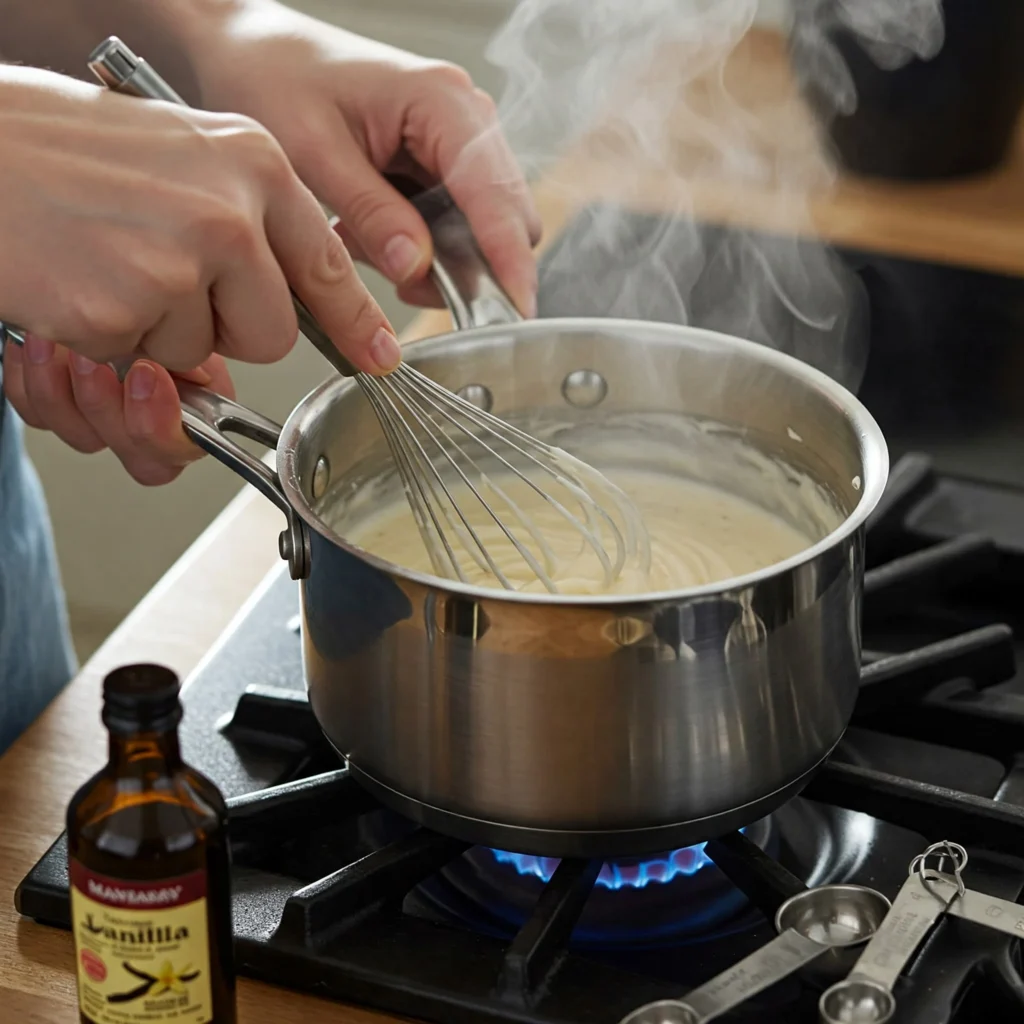
Step 1: Preparing the Vanilla Ice Cream Base
The foundation of any great homemade Eskimo pie popsicle recipe is the ice cream base. Here’s how to make it perfect:
In a medium saucepan, combine the cream, milk, and sugar over medium heat. Stir until the sugar completely dissolves, but don’t let it boil. Remove from heat and add vanilla extract and a tiny pinch of salt (this makes the vanilla flavor pop!).
Let this mixture cool to room temperature. This cooling step is super important – if you try to freeze a warm mixture, you’ll get ice crystals.
For the sweetest results, taste your mixture before freezing. If it tastes slightly too sweet when liquid, it will be perfect when frozen (cold numbs sweetness a bit).
Want to play with flavors? Try adding:
- 1 teaspoon almond extract for a nutty twist
- 2 tablespoons cocoa powder for chocolate ice cream
- 1 teaspoon cinnamon for a warm spice note
Step 2: Molding and Freezing Your Popsicles
Now it’s time to create the shape for your homemade Eskimo pie popsicle recipe!
Fill your popsicle molds about 90% full (the mixture will expand slightly when frozen). If you don’t have popsicle molds, paper cups work great with wooden sticks. Pro tip: wait until the mixture starts to freeze (about 30 minutes) before adding sticks so they stand straight.
Place your filled molds in the freezer on a flat surface. For the best texture, freeze for at least 4 hours, but overnight is even better.
Having trouble with sticks moving? Place foil over the tops of the molds with small slits for the sticks to help keep everything in place.
Step 3: Creating the Perfect Chocolate Shell
The chocolate coating is what makes an Eskimo pie special! For your homemade Eskimo pie popsicle recipe, choose good quality chocolate – it really makes a difference.
Break or chop 8 ounces of chocolate into small pieces. Add to a heatproof bowl with 2 tablespoons of coconut oil. Melt using one of these methods:
- Microwave in 30-second bursts, stirring between each
- Place over a pot of simmering water (double-boiler method)
Stir until completely smooth. Let the mixture cool slightly – it should be fluid but not hot. Hot chocolate will melt your ice cream!
Want to make your coating extra special? Try adding:
- ¼ cup chopped nuts
- 2 tablespoons sprinkles
- ½ teaspoon peppermint extract
Step 4: Dipping Technique for Perfect Coverage
This step in our homemade Eskimo pie popsicle recipe requires quick work!
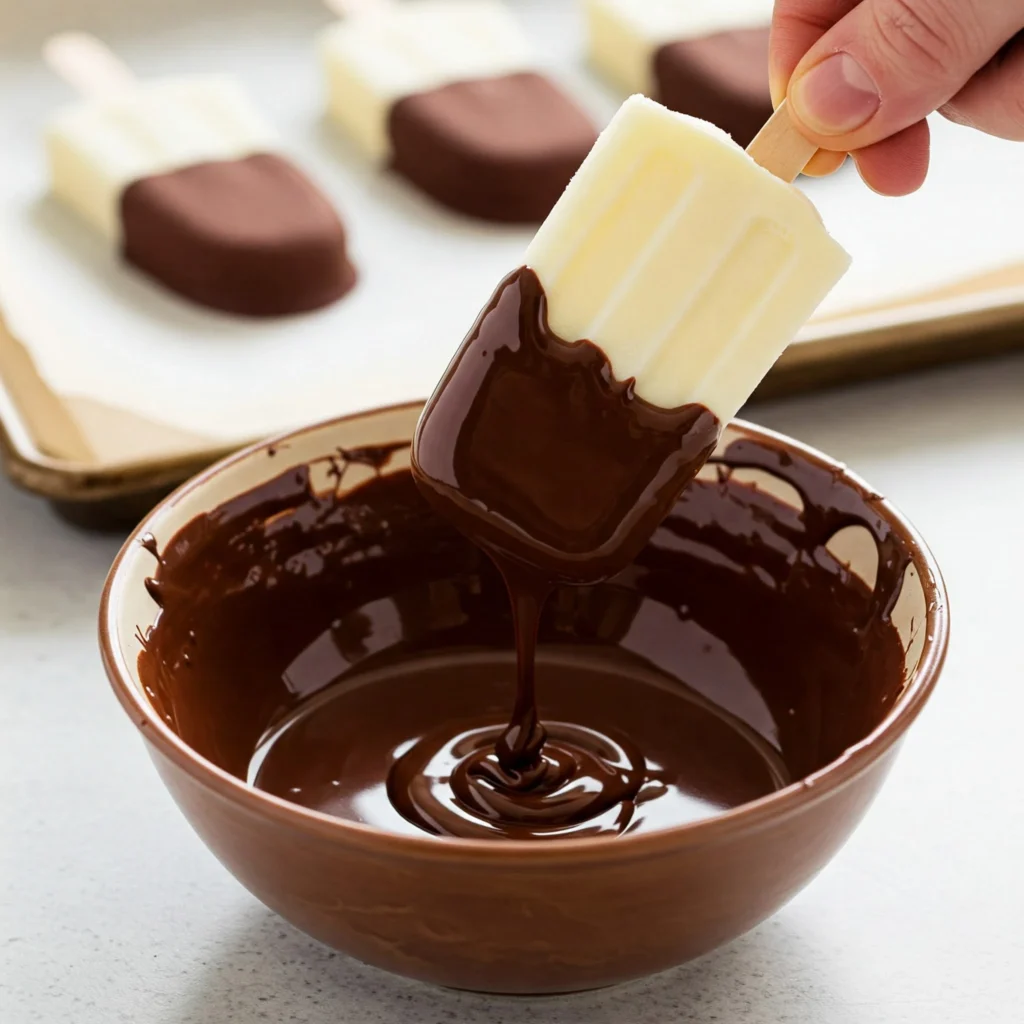
First, prepare a baking sheet lined with parchment paper. Make sure there’s room in your freezer for it.
Take one frozen popsicle from the mold (run under warm water for a few seconds if stuck). Hold by the stick and quickly dip into the chocolate mixture, tilting the bowl to cover all sides.
Let excess chocolate drip off for a few seconds, then place on the parchment paper. The coating should harden within 30 seconds due to the temperature difference.
For the most even coating, make sure your chocolate isn’t too hot or too thick. It should flow like heavy cream. If it’s too thick, add a bit more coconut oil.
Step 5: Final Freezing and Storage
After all popsicles are coated in your homemade Eskimo pie popsicle recipe, return them to the freezer for at least 30 minutes.
For storage, wrap each popsicle individually in wax paper or parchment, then place in a freezer-safe container or zip-top bag. This prevents them from sticking together and protects them from freezer burn.
Properly stored, your homemade Eskimo pies will stay fresh for up to 1 month, though they taste best within the first week.
Customizing Your Homemade Eskimo Pie Popsicle Recipe
Dietary Variations
Everyone should be able to enjoy a homemade Eskimo pie popsicle recipe! Here are some easy swaps:
For dairy-free treats:
- Replace heavy cream with full-fat coconut milk
- Use almond or oat milk instead of whole milk
- Choose dairy-free chocolate for coating
For vegan options:
- Use the dairy-free swaps above
- Check that your sugar is vegan (some are processed with bone char)
- Make sure your chocolate is vegan-friendly
Want less sugar? Try:
- Reducing sugar to ½ cup
- Using monk fruit sweetener or erythritol (use ⅓ less than sugar)
- Choosing darker chocolate (70%+) for the coating
Flavor Inspirations
Your homemade Eskimo pie popsicle recipe can go beyond vanilla! Try these tasty versions:
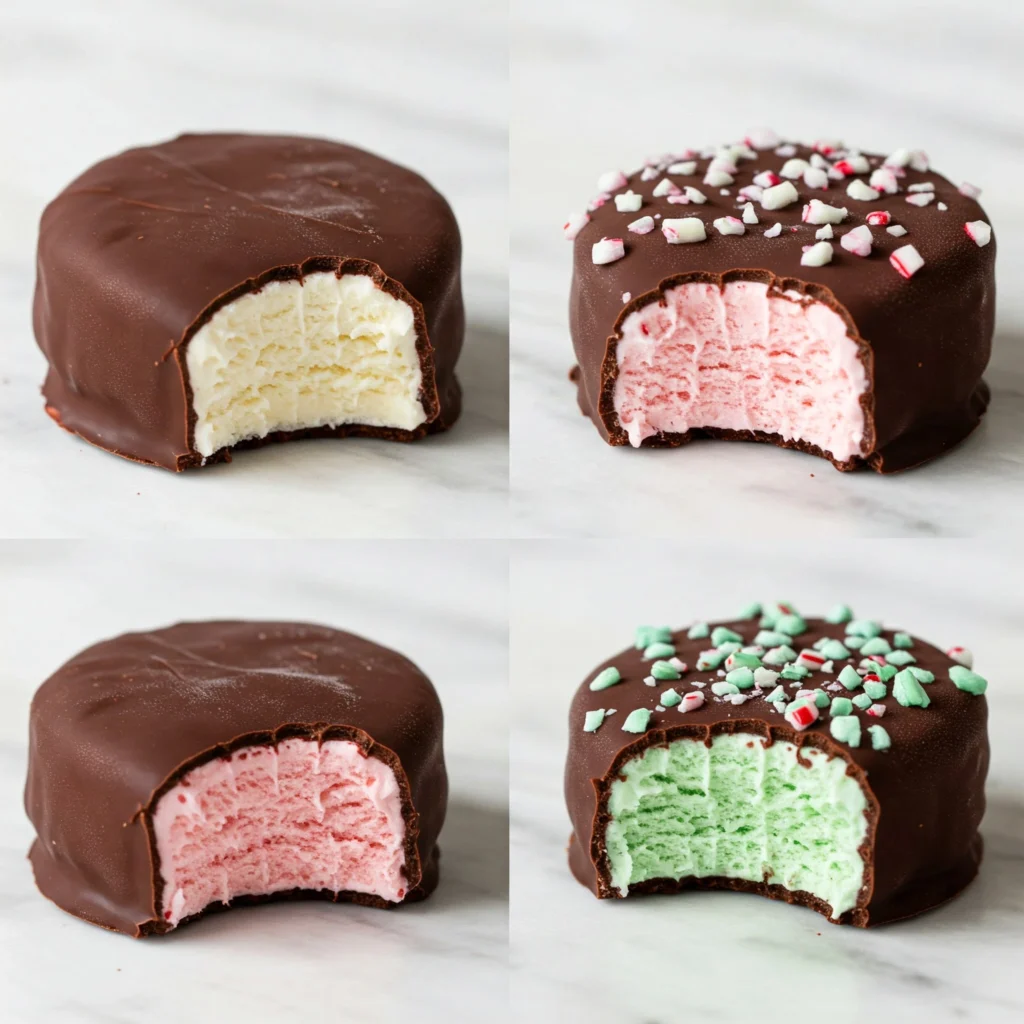
Mint Chocolate Dream:
- Add ½ teaspoon peppermint extract to the ice cream base
- Use dark chocolate for the coating
- Sprinkle crushed peppermint candies on top before freezing
Strawberry Sensation:
- Blend 1 cup fresh strawberries into the base mixture
- Add a drop of red food coloring if you want a pink color
- White chocolate coating pairs beautifully with this!
Cookies & Cream Delight:
- Mix ½ cup crushed chocolate cookies into the ice cream base
- Use white chocolate for the coating
- Sprinkle more cookie crumbs on the wet chocolate before it sets
Troubleshooting Your Homemade Eskimo Pie Popsicle Recipe
Common Problems and Solutions
Even with a great homemade Eskimo pie popsicle recipe, little issues can pop up. Here’s how to fix them:
Melting too fast while dipping?
- Work with only 1-2 popsicles out of the freezer at a time
- Make sure your chocolate mixture has cooled slightly
- Have your parchment-lined tray in the freezer, ready to go
Ice crystals in your ice cream?
- Make sure your base is completely cool before freezing
- Use higher fat dairy products
- Don’t take the popsicles in and out of the freezer repeatedly
Chocolate cracking off or not setting properly?
- Add a bit more coconut oil to the chocolate mixture
- Make sure the ice cream is fully frozen before dipping
- Cool the chocolate slightly before dipping
Conclusion
You’ve now mastered the homemade Eskimo pie popsicle recipe from start to finish! These classic treats bring joy to hot summer days and make sweet endings to family dinners. The best part is knowing exactly what goes into them – real ingredients that you can feel good about sharing.
Remember that making your own Eskimo pies isn’t just about the end result. It’s about the fun of creating something special in your kitchen. Each step is simple enough that kids can help too, making this a perfect family project.
We’d love to see how your homemade Eskimo pie popsicle recipe turns out! Try our basic recipe first, then get creative with your own flavor combinations. Take a picture before you bite in and share it with us!
FAQ About Homemade Eskimo Pie Popsicle Recipes
Can I use store-bought ice cream for this recipe? Yes! Soften it slightly, spoon into molds, refreeze, then follow the dipping steps. It’s a great shortcut for our homemade Eskimo pie popsicle recipe.
How do I prevent the chocolate from cracking? Make sure to add enough coconut oil to your chocolate (about 2 tablespoons per 8 ounces of chocolate), and let the coating set at room temperature before final freezing.
What’s the best type of chocolate to use? Semi-sweet or milk chocolate work best for traditional flavor. High-quality chocolate chips or baking bars both work well in this homemade Eskimo pie popsicle recipe.
Can I make these without special molds? Absolutely! Paper cups, silicone cupcake liners, or even ice cube trays (for mini versions) work great. Just insert sticks when partially frozen.
How far in advance can I make these treats? Your homemade Eskimo pie popsicle recipe will stay fresh for up to a month in the freezer if wrapped individually. Make them a day ahead for parties!